How to build a dynamic Angular form?
Need to build a dynamic Angular form?
Here's the step-by-step tutorial you can follow to build an Angular dynamic form. With plenty of examples and code.

PSST - Want to go straight to the code? Click here.
How can you make your Angular form roll with the punches? 👊 👊 👊
What does it take to build dynamic forms in Angular?
And can we create an Angular dynamic form from JSON?
We've got lots of stuff to cover so grab your britches, clutch your hat and settle in for the ride.
Table of Content 👇
- A common story
- Creating the data models
- Creating the data service
- Create the form input component
- Create the form component
- Populating our dynamic Angular form with JSON
- Conclusion
- Further Reading
A common story
The Angular project you're sweating over is turning into a smashing success...
Your client or boss is tickled with the progress you're making every day...
And you're ready to be done...
But all of a sudden at the last minute there's this change to on of the Angular forms that must happen before you launch. And it must happen NOW!
Sigh. 😕 😕 😕
These kinds of scenarios are common. So how about a proactive approach that will allow us to dynamically render an Angular form? Without taking a kick in the teeth?

How about we build a dynamic Angular form so that we can throw it a blob of JSON or some other common schema that it can render?
Great idea eh?
But... Umm... let me see. What might we need to render dynamically? We've got all kinds of things to handle like...
- Input text
- Textarea
- Radio buttons
- Checkboxes
- Form Validation
- And more...
Oh sizzles! Is there any way to do this elegantly?
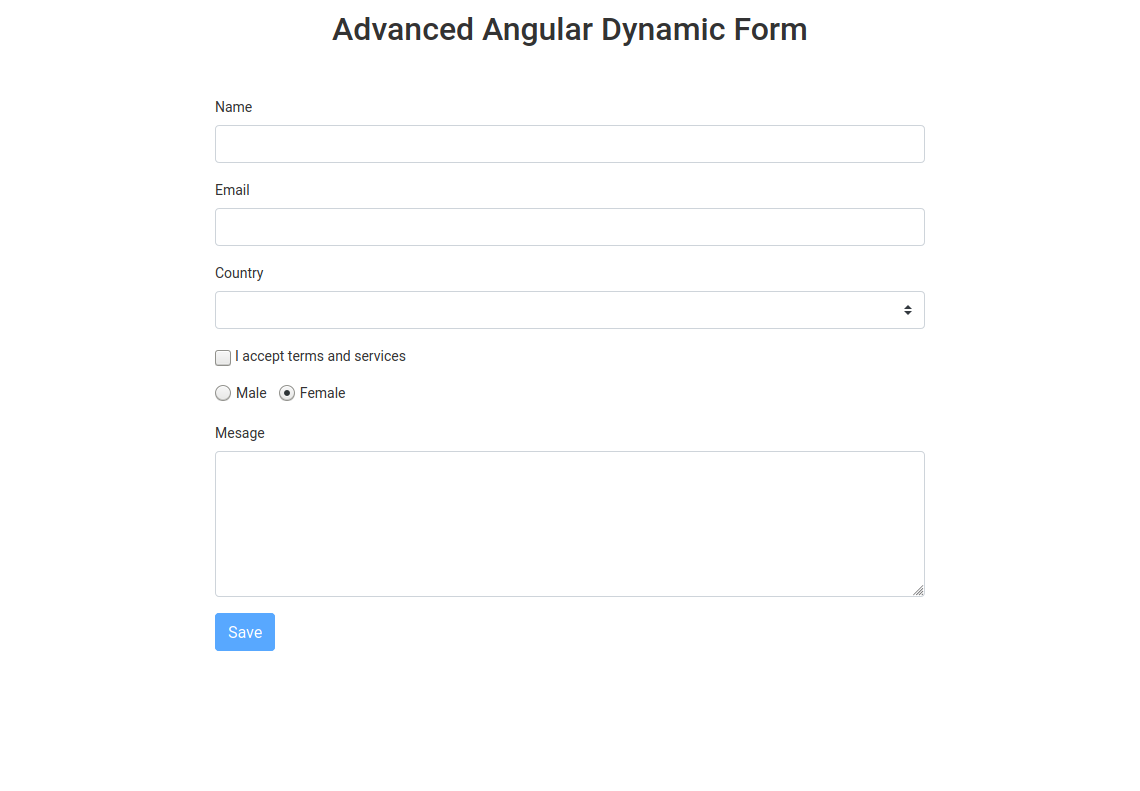
In this article I'll guide you step-by-step to build a dynamic Angular form - like the one pictured below.

This example uses Bootstrap CSS to style the form but you get to style it however you want.
Want all the code right away? Here's the link.
Creating the data models
The first step is to create a model for our input fields. We'll create a file called form-field.ts and export our model like so.
export class FormField<T> {
  value: T;
  key: string;
  label: string;
  required: boolean;
  validator: string;
  order: number;
  controlType: string;
  type: string;
  options: { key: string; value: string }[];

  constructor(
    options: {
      value?: T;
      key?: string;
      label?: string;
      required?: boolean;
      validator?: string;
      order?: number;
      controlType?: string;
      type?: string;
      options?: { key: string; value: string }[];
    } = {}
  ) {
    this.value = options.value;
    this.key = options.key || "";
    this.label = options.label || "";
    this.required = !!options.required;
    this.validator = options.validator || "";
    this.order = options.order === undefined ? 1 : options.order;
    this.controlType = options.controlType || "";
    this.type = options.type || "";
    this.options = options.options || [];
  }
}
Creating the data service
The next step is to create a service that will take our data source and return a form group.
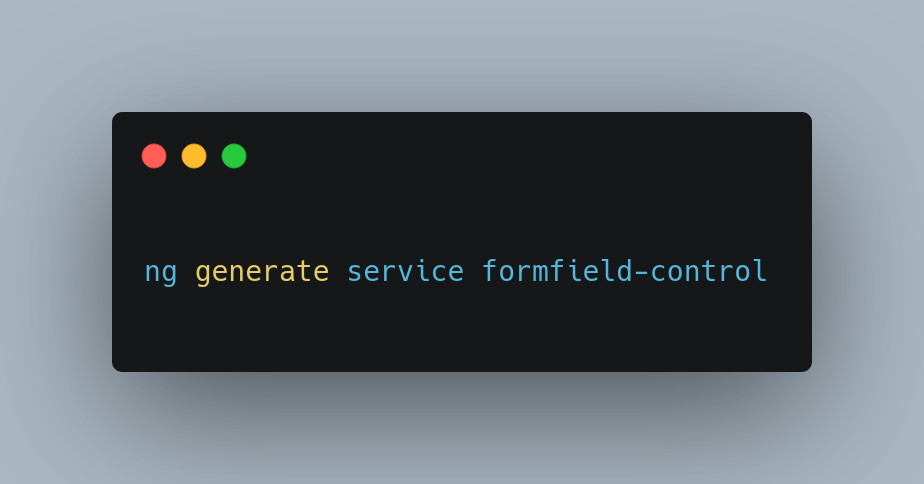
We'll whip out the Angular CLI and generate the service using the following command.

And add some dynamic form powers with the following code.
import { Injectable } from '@angular/core';
import { FormControl, FormGroup, ValidatorFn, Validators } from '@angular/forms';
import { of } from 'rxjs';
import { FormField } from './form-field';

@Injectable({
  providedIn: 'root'
})
export class FormfieldControlService {

  constructor() { }

  toFormGroup(inputs: FormField<string>[]): FormGroup {
    const group: any = {};
    inputs.forEach(input => {
      let validator: ValidatorFn[] = input.required ? [Validators.required] : [];
      switch (input.validator) {
        case "email":
          validator.push(Validators.email);
          break;
        default:
          break;
      }
      group[input.key] = validator.length > 0 ? new FormControl(input.value || '', validator)
                                        : new FormControl(input.value || '');
    });

    return new FormGroup(group);
  }

  getFormFields() {

    const inputs: FormField<string>[] = [

      new FormField<string>({
        controlType: "textbox",
        key: 'name',
        label: 'Name',
        required: true,
        order: 1
      }),

      new FormField<string>({
        controlType: "textbox",
        key: 'email',
        label: 'Email',
        type: 'email',
        required: true,
        validator: "email",
        order: 2
      }),

      new FormField<string>({
        controlType: "dropdown",
        key: 'country',
        label: 'Country',
        options: [
          {key: 'usa',  value: 'United States of America'},
          {key: 'br',  value: 'Brazil'},
          {key: 'other',   value: 'Other'}
        ],
        order: 3
      }),

      new FormField<string>({
        controlType: "checkbox",
        key: 'agree',
        label: 'I accept terms and services',
        type: 'checkbox',
        required: true,
        order: 4
      }),

      new FormField<string>({
        controlType: "radio",
        key: 'sex',
        label: 'Sex',
        type: 'radio',
        options: [
          {key: 'male',  value: 'Male'},
          {key: 'female',  value: 'Female'}
        ],
        order: 5
      }),

      new FormField<string>({
        controlType: "textarea",
        key: 'message',
        label: 'Mesage',
        type: 'textarea',
        order: 6
      })
    ];

    return of(inputs.sort((a, b) => a.order - b.order));
  }

}
Overwhelming? Confused?
Great. That means you're learning new things!
Notice that in this service we have two functions. One that takes a group of FormField and returns a FormGroup. And a second function that returns a group of FormField. The second function is where you get to use your imagination to pull the form data from whatever kind of source you like.
Create the form input component
The next step is to create the components that will render our dynamic form.
We'll create the first one and call it dynamic-form-input. Here's the Angular CLI command.
ng generate component dynamic-form-inputWe'll edit dynamic-form-input.component.ts like to take the FormGroup and FormField<string> as an Input.
import { Component, Input, OnInit } from '@angular/core';
import { FormGroup } from '@angular/forms';
import { FormField } from '../form-field';

@Component({
  selector: 'app-dynamic-form-input',
  templateUrl: './dynamic-form-input.component.html',
  styleUrls: ['./dynamic-form-input.component.css']
})
export class DynamicFormInputComponent {

  @Input() input: FormField<string>;
  @Input() form: FormGroup;

  get isValid() { return this.form.controls[this.input.key].valid; }

}
And finally edit dynamic-form-input.component.html to render the form field.
<div [formGroup]="form" class="form-group">

    <div [ngSwitch]="input.controlType">

      <div *ngSwitchCase="'textbox'">
        <label [attr.for]="input.key">{{input.label}}</label>
        <input class="form-control" [formControlName]="input.key" [id]="input.key" [type]="input.type">
      </div>

      <div *ngSwitchCase="'dropdown'">
        <label [attr.for]="input.key">{{input.label}}</label>
        <select class="custom-select" [id]="input.key" [formControlName]="input.key">
          <option *ngFor="let opt of input.options" [value]="opt.key">{{opt.value}}</option>
        </select>
      </div>

      <div *ngSwitchCase="'checkbox'">
        <div class="form-check">
          <input class="form-check-input" type="checkbox" [formControlName]="input.key" [id]="input.key">
          <label class="form-check-label" [attr.for]="input.key">{{input.label}}</label>
        </div>
      </div>

      <div *ngSwitchCase="'radio'">
        <div class="form-check form-check-inline" *ngFor="let opt of input.options">
          <input class="form-check-input" type="radio" [formControlName]="input.key" [id]="input.key" [value]="opt.value">
          <label class="form-check-label" [attr.for]="opt.key"> {{ opt.value }} </label>
        </div>
      </div>

      <div *ngSwitchCase="'textarea'">
        <label [attr.for]="input.key">{{input.label}}</label>
        <textarea class="form-control" [formControlName]="input.key" [id]="input.key" rows="5"></textarea>
      </div>

    </div>

</div>
Create the form component
And finally we'll generate our last component.
ng generate component dynamic-formHere's the code for the .ts file.
import { FormGroup } from '@angular/forms';
import { FormField } from '../form-field';
import { FormfieldControlService } from '../formfield-control.service';

@Component({
  selector: 'app-dynamic-form',
  templateUrl: './dynamic-form.component.html',
  styleUrls: ['./dynamic-form.component.css']
})
export class DynamicFormComponent implements OnInit {

  @Input() formFields: FormField<string>[] = [];
  form: FormGroup;
  payLoad = ' ';

  constructor(private formfieldService: FormfieldControlService) { }

  ngOnInit(): void {
    this.form = this.formfieldService.toFormGroup(this.formFields);
  }

  onSubmit() {
    this.payLoad = JSON.stringify(this.form.getRawValue());
  }

}
And the HTML that will get rendered.
<div>
  <form (ngSubmit)="onSubmit()" [formGroup]="form">

    <div *ngFor="let formField of formFields" class="form-group">
      <app-dynamic-form-input [input]="formField" [form]="form"></app-dynamic-form-input>
    </div>

    <div class="form-group">
      <button type="submit" class="btn btn-primary" [disabled]="form.invalid">Save</button>
    </div>
  </form>

  <div *ngIf="payLoad" class="form-group">
    <strong>Here's the payload</strong><br>{{payLoad}}
  </div>
</div>
Populating our dynamic Angular form with JSON
So we've got our dynamic Angular form wired up. All we got to do is "plug it in".
In our app.component.ts file we'll fetch the data for our dynamic form.
import { Component } from '@angular/core';
import { Observable } from 'rxjs';
import { FormField } from './form-field';
import { FormfieldControlService } from './formfield-control.service';

@Component({
  selector: 'app-root',
  templateUrl: './app.component.html',
  styleUrls: ['./app.component.css'],
  providers: [FormfieldControlService]
})
export class AppComponent {
  title = 'AngularDynamicForms';
  formFields: Observable<FormField<any>[]>;
  constructor(service: FormfieldControlService) {
    this.formFields = service.getFormFields();
  }
}
And then in app.component.html we'll declare the dynamic form template and pass it the dynamic data.
<app-dynamic-form [formFields]="formFields | async "></app-dynamic-form>BOING!!! There it is!

Conclusion
This is an advanced example and explanation of how a dynamic Angular form can be created.
We looked at building a model to model the different form fields, and then create a service to handle those form fields and finally rendering the dynamic form in a component.
Too much work you say? This is a complex solution for a simple contact form but when requirements spin wheels on a dime it's worth considering the dynamic Angular form.
What do you think? Is it worth going to the extra work to create a dynamic Angular form?
Let me know in the comments below. 👇👇👇

Angular Consultant
