
Angular Reactive Forms - The complete step-by-step guide
Need to create a reactive form with Angular?
Here's how to harness the power of reactive Angular forms in your web application. Plenty of examples and code included.
Can you imagine the web without any kind of input form?

No my friend, no way ever can I imagine the internet without its millions if not billions amount of forms.
Forms are the building block in any kind of interactive web application. They are a critical piece. And without them the internet would be a different world.
Some might say that the job of building a web form has the charm of a foot wart. There are lots of moving pieces, and if you're not an expert it can be frustrating.
But I argue that any Angular developer worth their dough ought to be able to build at least a simple form.
So how can we build an Angular form? And more specifically, how do you build a great reactive Angular form?
What is a reactive Angular form?
A reactive form in Angular is a form that gives us a dynamic, model-driven approach to handling user input. It's a great choice when binding modelled data to the UI, the very principle that Angular excels at doing. Reactive forms are recommended for more complex forms because of their power, although they are a great choice for simple forms as well as we'll see shortly. Reactive forms also tend to be easier to test.
Creating your first Angular form
We'll begin by creating a new Angular application for this demo.
ng new AngularFormsExampleNext we'll create our reactive Angular form component.
ng generate component ReactiveFormNow we need to import the ReactiveFormsModule from the Angular framework.
In our app.module.ts file we'll add it to our imports. Like so.
import { BrowserModule } from '@angular/platform-browser';
import { NgModule } from '@angular/core';
import { ReactiveFormsModule } from '@angular/forms';

import { AppComponent } from './app.component';
import { ReactiveFormComponent } from './reactive-form/reactive-form.component';

@NgModule({
  declarations: [
    AppComponent,
    ReactiveFormComponent,
  ],
  imports: [
    BrowserModule,
    ReactiveFormsModule
  ],
  providers: [],
  bootstrap: [AppComponent]
})
export class AppModule { }
In our reactive-form.component.ts file we'll declare our inputs using the Angular FormControl.
import { Component, OnInit } from '@angular/core';
import { FormControl } from '@angular/forms';

@Component({
  selector: 'app-reactive-form',
  templateUrl: './reactive-form.component.html',
  styleUrls: ['./reactive-form.component.css']
})
export class ReactiveFormComponent {

  name = new FormControl('');
  email = new FormControl('');
  message = new FormControl('');

  constructor() { }

}
In reactive-form.component.html we'll build out a simple contact form.
<label for="name">Name</label>
<br>
<input type="text" name="name" id="name" [formControl]="name" style="margin-bottom: 25px">
<br>
<label for="email">Email</label>
<br>
<input type="email" name="email" id="email" [formControl]="email" style="margin-bottom: 25px;">
<br>
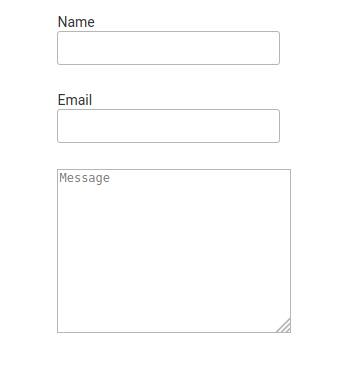
<textarea placeholder="Message" cols="30" rows="10" [formControl]="message"></textarea>Finally, we add the reactive-form-component to the app.component.html like so.
<div class="content" role="main">
  <app-reactive-form></app-reactive-form>
</div>
And now our app should look like this.
But how do we access the values in our Angular form?
You can use the .value property to get the value of any form control.
<p>{{ name.value }}</p>
<p>{{ email.value }}</p>
<p>{{ message.value }}</p>
Not a bad start. We've built a simple contact form... but as our form grows this approach begins to feel rather scattered.
Can we do better?
Let's explore the power of grouping our form controls.
Using Angular Form Groups
We'll take the same form example from above but group it into a single piece. We'll call this piece a FormGroup.
import { Component, OnInit } from '@angular/core';
import { FormControl, FormGroup } from '@angular/forms';

@Component({
  selector: 'app-reactive-form',
  templateUrl: './reactive-form.component.html',
  styleUrls: ['./reactive-form.component.css']
})
export class ReactiveFormComponent {

  contactForm = new FormGroup({
    name: new FormControl(''),
    email: new FormControl(''),
    message: new FormControl('')
  });

  constructor() { }

}
And update our view.
<form [formGroup]="contactForm">
    <label for="name">Name</label>
    <br>
    <input type="text" name="name" id="name" formControlName="name" style="margin-bottom: 25px">
    <br>
    <label for="email">Email</label>
    <br>
    <input type="email" name="email" id="email" formControlName="email" style="margin-bottom: 25px;">
    <br>
    <textarea placeholder="Message" cols="30" rows="10" formControlName="message"></textarea>
</form>
Obviously nothing has visibly changed for the user. So...
What's the point of grouping the form controls?
Why would you use a form group?
The reason for grouping the form controls is that we want to group all related inputs into one single form. This really shines when binding modelled data to a form.
Let's say we have a data model, this can be a class or interface, that we want our form to use.
export class ContactForm {
    name: string;
    email: string;
    message: string;
}
And then when our form is submitted we want to cast the form groups values to this data model. That's as simple as...
let data = this.contactForm.value as ContactForm;...and then post it an API or some other data point and you're done.
Validating input
Remember the famous saying? Garbage in. Garbage out!
Verifying the data your form receives is imperative. And accepting any kind of junk is to skate on thin ice. You can't say you haven't been warned.
So how do we validate input?
It's as simple as using Angular's built in form validation options.
contactForm = new FormGroup({
    name: new FormControl('', Validators.required),
    email: new FormControl('', [Validators.required, Validators.email]),
    message: new FormControl('', Validators.required)
  });
And next add a submit button to our form that is only enabled when all form inputs are valid.
<button type="submit" [disabled]="this.contactForm.invalid">Send</button>And you are done!
You can check out Angular's Validators here. There are all kinds of options to use, like...
Summary
Bingo! You've made an awesome start to mastering Angular's powerful form options.
If you're interested in taking your reactive Angular form to the next level, then consider converting it to a dynamic form. I cover this in detail in my article about How to build a dynamic form with Angular.
Questions or contacts? Don't hesitate to reach out.

Angular Consultant